


Among many image editing software’s more then a decade back Photoshop has it’s own identity. Photoshop is easy to use & provides large number of facilities to play with an image. In the career of UI or UX designer Photoshop is a very useful tool. Are you started your career in web designing recently? If so, you must learned HTML, CSS, JAVASCRIPT & JQUERY but keep remember in web designing images play great role. So it’s wise for your career growth to learn Photoshop. In this session let us share the basics from Photoshop Tutorial for absolute Beginners.
Understanding the Photoshop Interface
When launching Photoshop for the first time, the interface may appear complex. The workspace consists of several key components:
1. Menu Bar – Located at the top, it contains dropdown menus like File, Edit, Image, and Layer, offering access to essential functions.
2. Tools Panel – Positioned on the left side, this panel houses tools for selection, painting, text, and more. Hovering over each tool displays its name and shortcut key.
3. Options Bar – Below the menu bar, it adjusts settings for the currently selected tool.
4. Panels – On the right side, panels like Layers, Adjustments, and Properties provide additional controls. Panels can be rearranged or hidden via the Window menu.
5. Document Window – The central area where your image or project is displayed. Multiple documents can be opened as tabs.
How to convert an JPG/JPEG image to PNG?
During web designing sometimes we required to convert an image from one format to other. In this case Photoshop is very useful. Using Photoshop you can create various kind of image formats (BMP, GIF, JPEG, PNG, TIFF & many more). Let’s take an example how to convert a JPG/JPEG image to PNG. To do this follow the following steps.
- Open your JPG/JPEG image using Ctrl + O in Photoshop.
- Then go to File > Save As option.
- In Save As dialog type the file name & select the type of format you required for your image & Save.
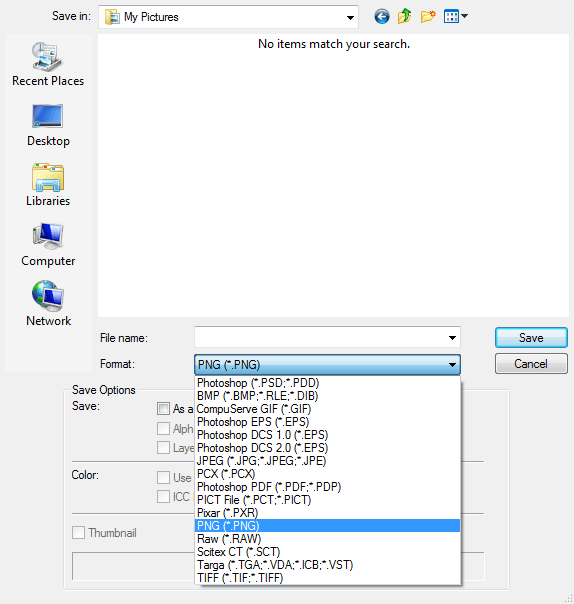
Photoshop Save As Dialog.
How to Resize an Image?
Let’s take a case where your Customer provided you an image of resolution 700 x 385 pixels. During the web page designing you found you need to resize the image to width 600 pixels. To do this is Photoshop follow the following steps.
- Open the image using Ctrl + O.
- Then to open the resize dialog press Alt + i + i.
- In resize dialog update the image width & height you required. By nature Photoshop provides facility to resize your image in Constrain Proportions. If you want your image in fixed width & height uncheck this option in resize window.
- Then Click OK & Finally Save the image.
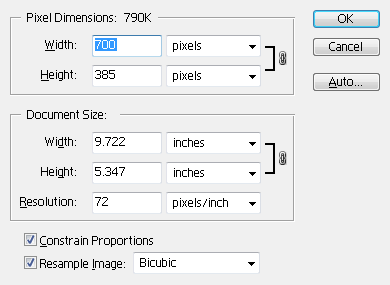
Photoshop Resize Dialog.
How to Crop an Image?
In a large image sometime you required to select a specific portion. This trick is called image crop. Using Photoshop it is very easy to crop an image. Follow the below steps. In this example from my fantasy.jpg I want select the only bridge portion.
- Open (Ctrl + O) the image file “fantasy.jpeg”.
- From tool bar select the “Crop Tool”.
- Then drag the mouse pointer to select the required portion from image. If in one take you can’t select the correct area for the required portion, you can adjust the crop area using marquee.
- Finally after the area get selected press Enter.
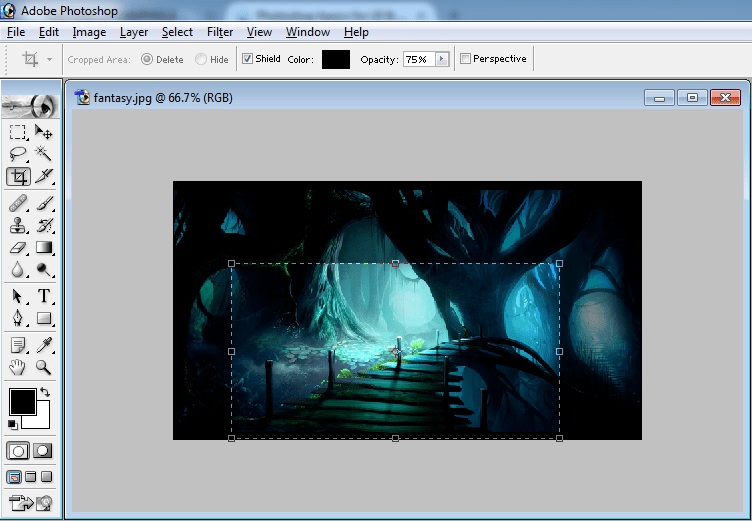
Photoshop Crop Operation.
How to Know Color Code for a Specific Color?
During we convert a PSD to HTML we required to know Color codes to apply that in HTML. Here in this example (fantasy.jpg) I want to know the color code for central lighting areas.
- Open fantasy.jpeg (Ctrl + O).
- Select Eye dropper tool from Toolbar.
- Then click on the central lighting area. On click the color will reflect on Set Foreground Color box.
- Click on Set Foreground Color box in Toolbar.
- It will show you the Color picker window. Look at the last input box of Color picker window. Here you will get the Hexadecimal color code (#AAE5E9) for your required color.
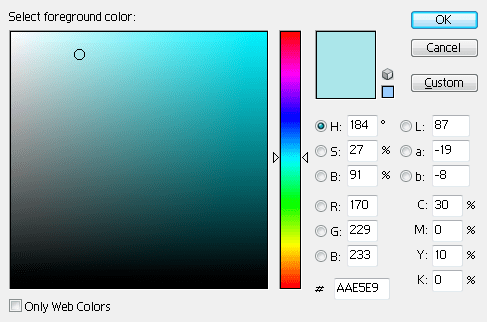
Photoshop Color Picker
How to adjust Brightness & Contrast for an image?
During photography sometime we did mistake in light balance. The result images get darker or more exposed to lighting. Don’t worry using Photoshop we can easily control Brightness & Contrast for those images. Let’s take an example here I want to increase brightness for my image fantasy.jpeg. To do so
- Open (Ctrl + O) the image fantasy.jpeg.
- Then in menu bar go to Image > Adjustments > Brightness/Contrast… (As shown in the below image).
- Click on this & Open Brightness/Contrast window.
- Here you can adjust brightness & contrast for your image.
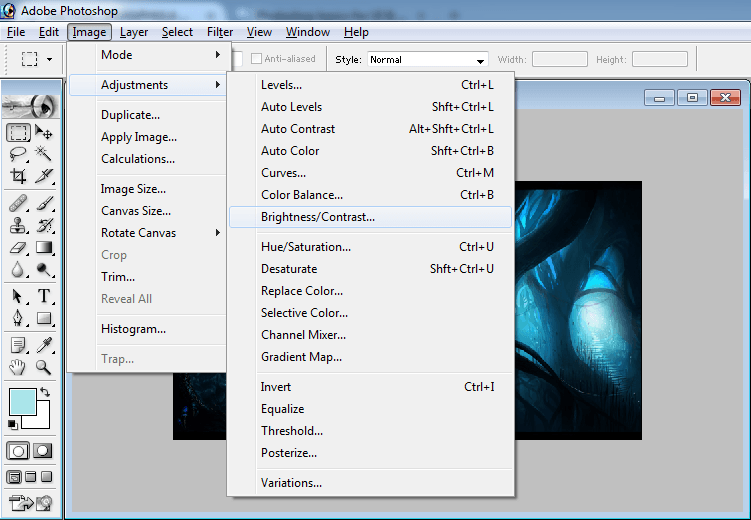
Photoshop Brightness/Contrast Option.
How to Create an image with transparent background?
Generally during we place a logo in a web-page we required the image with transparent background. To show you “How to Create an image with transparent background using Photoshop?” here I downloaded the logo of Intel with white background. Let you know the steps how to make this logo with transparent background.
- Open (Ctrl + O) the logo file (intel-logo.jpeg).
- From toolbox select the Magic Wand Tool.
- Click on the white area of the logo image. You will saw except logo all white portions of image will get selected. To select the inner white portion of “e” from intel. Press Shift & Click again with Magic Wand Tool.
- To select the only logo press Ctrl + Shift + i. Then Copy this.
- Now to Open a New Window press Ctrl + N. In New window Before Click OK to generate a new window Change the contents mode to Transparent. Then click OK.
- Now in new window press Ctrl + V to paste the Copied logo. You will see your logo is ready with transparent background. Save it & Use it.
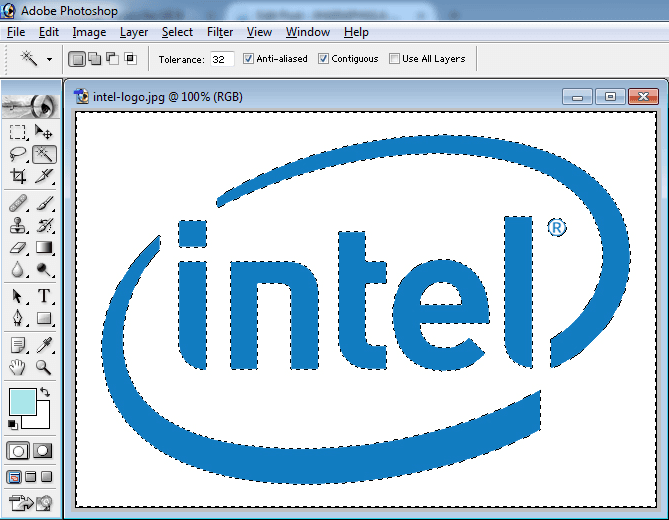
Using Photoshop Magic Wand Tool.
How to Optimize an Image for web-page?
Large weight images take more time to load. During http request it is better if we request an optimized image in place of normal one. Optimized images helps to reduce server load by loading the web-page faster. Let’s take an example of fantasy.jpeg to optimized this for web-page go with following steps.
- Open (Crtl + O) the image fantasy.jpeg.
- Go to File > Save for Web Option & Click it to Open the dialog.
- Then Go for 4-up tab. Here you will see the resolution & size of image. According to your requirement select the one you like. Then Save it. In this case you can reduce the image size then normal.
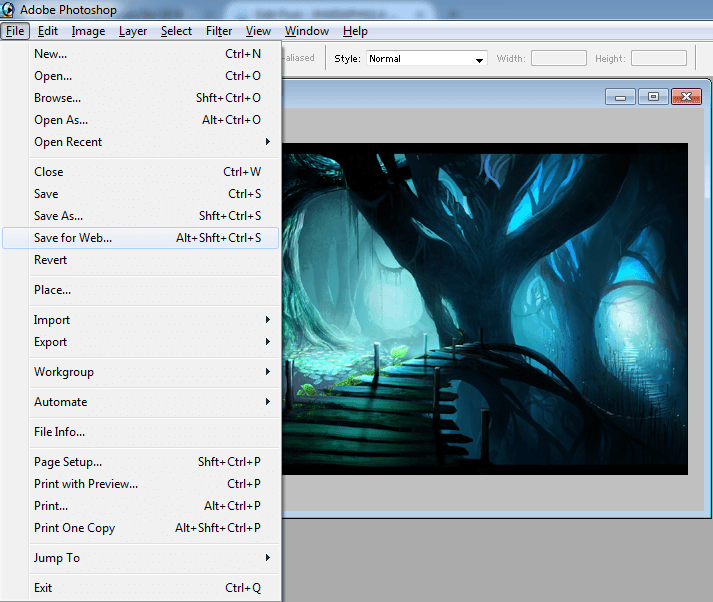
Image Optimization in Photoshop.
Essential Photoshop Tools
1. Selection Tools
– Rectangular Marquee Tool (M): Selects rectangular or square areas.
– Lasso Tool (L): Freehand selection for irregular shapes.
– Magic Wand Tool (W): Selects pixels based on color similarity.
– Quick Selection Tool (W): Automatically detects edges for precise selections.
Pro Tip: Refine selections using Select > Select and Mask for smoother edges.
2. Brush Tool (B) The Brush Tool is fundamental for painting, retouching, and masking:
– Adjust brush size with [ ] keys.
– Modify opacity and flow for softer or more controlled strokes.
– Experiment with brush presets in the Brush Settings panel.
3. Layers Panel Layers are the backbone of Photoshop, allowing non-destructive editing:
– Create a New Layer: Click the New Layer icon or press Ctrl/Cmd + Shift + N.
– Layer Opacity: Adjust transparency in the Layers panel.
– Blend Modes: Change how layers interact (e.g., Multiply for shadows, Screen for highlights).
4. Clone Stamp and Healing Brush Tools These tools are essential for retouching:
– Clone Stamp (S): Copies pixels from one area to another (Alt/Option + Click to sample).
– Spot Healing Brush (J): Automatically blends blemishes with surrounding pixels.
5. Text Tool (T) Add and customize text with:
– Type Tool (T): Click and drag to create a text box.
– Character Panel: Adjust font, size, color, and spacing.
Basic Photo Editing Techniques
1. Cropping and Straightening Use the Crop Tool (C) to:
– Remove unwanted edges.
– Straighten horizons with the Straighten option.
– Maintain aspect ratios for social media (e.g., 1:1 for Instagram).
2. Adjusting Brightness and Contrast Enhance exposure with:
– Image > Adjustments > Brightness/Contrast.
– Levels (Ctrl/Cmd + L): Fine-tune shadows, midtones, and highlights.
– Curves (Ctrl/Cmd + M): Adjust tonal range with precision.
3. Color Correction Fix color imbalances using:
– Hue/Saturation (Ctrl/Cmd + U): Shift hues and boost saturation.
– Color Balance (Ctrl/Cmd + B): Adjust color tones.
– Vibrance: Subtly enhances colors without oversaturation.
4. Removing Backgrounds Isolate subjects with:
– Quick Selection Tool (W): Select the subject.
– Select and Mask: Refine edges with smoothing and feathering.
– Delete or Mask: Remove or hide the background.
Advanced Photoshop Techniques
1. Layer Masks Non-destructively hide or reveal parts of a layer:
1. Select a layer and click the Add Layer Mask icon. 2. Paint with black to hide and white to reveal. 3. Use gradients for smooth transitions.
2. Smart Objects Convert layers to Smart Objects to preserve quality when scaling or applying filters:
– Right-click a layer > Convert to Smart Object.
3. Filters and Effects Apply creative effects:
– Blur Gallery: Add depth with Field Blur or Tilt-Shift. – Liquify (Shift + Ctrl + X): Reshape features subtly. – Camera Raw Filter (Shift + Ctrl + A): Advanced photo adjustments.
4. Creating Composites Combine multiple images seamlessly:
1. Align layers using Edit > Auto-Align Layers. 2. Blend with layer masks and adjustment layers. 3. Match lighting and colors for realism.
Exporting your Work
1. Saving for Web (JPEG, PNG, GIF) Optimize files for online use:
– File > Export > Save for Web (Legacy). – Choose format and adjust quality settings.
2. Print-Ready Files (PDF, TIFF, PSD) For high-quality prints:
– File > Save As > PDF or TIFF. – Ensure resolution is 300 dpi.
Conclusion
Mastering Photoshop requires practice and experimentation. By understanding the tools, layers, and essential techniques, you can elevate your creative projects from simple edits to professional-grade designs. Keep exploring new features, follow tutorials, and refine your skills to unleash the full potential of Adobe Photoshop.